How to Make Your PWA Work Offline

You probably know what Progressive Web App—along with its industry-changing features—already is, but for the sake of iteration, let us repeat once more the amazing, uniquely PWA features that can potentially revolutionize the web experience, which is its offline capability.
Recommended reading: What is a PWA?
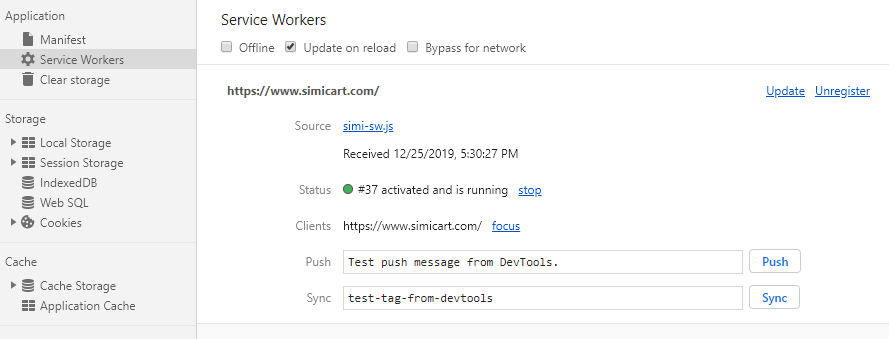
Unlike normal web whose viewing of content is only available with a connection, Progressive Web App differs in such a way that once the service workers—a built-in mechanism that’s responsible for many of PWA’s progressive features—have loaded the necessary files, offline viewing will be made possible and users can interact with the app even when offline.
Progressive Web Apps and Offline-availability
To know what all the fuss with PWAs is about—especially the offline capability of it, perhaps it’s time that you should experience first-hand an offline-viewing of our main website, which is also a PWA by definitions.
With Progressive Web Apps, the whole offline experience is no different than your typical experience with a connection—and that’s the beauty of it. This is a feature especially useful for eCommerce stores that need an uninterrupted browsing experience, even when no connection is present.
Notes: Every PWA site needs an initial caching of essential resources first before offline-viewing is made available to the user.
How to Make your PWA work Offline
It would be complicated to go into all the details of building a fully functional, offline-capable Progressive Web App, which is why today we’d start with the basics first. Our goal is to make a barebone Progressive Web App that works offline.
Prerequisites
- A plain website/web app. Anything with one
index.html, oneindex.jsand onestyle.csswill do.
Once you have all the prerequisites in order, it’s time to make your barebone PWA work offline!
Creating a basic service worker
First thing first, you’d need to create your sw.js which contains all the necessary code for a functional service worker.
// sw.js
self.addEventListener("fetch", event => {
    console.log("You fetched " + event.url);
});
Once you have your service worker created, let’s check if your browser supports it and reference it in your index.js:
// index.js
if ("serviceWorker" in navigator) {
    navigator.serviceWorker
        .register("sw.js")
        .then(() => console.log("registered service worker!"));
}
// the rest of your page's code...
The above code should be simple enough. It checks if your browser supports service workers and if so, returns a “registered service worker!”. By registering the service workers, you’re essentially telling the browser to use the sw.js as instructions for your service workers and in turn, associates the new service worker(s) with your site.
Now, back to the sw.js, add the following code:
// sw.js
self.addEventListener("fetch", event => {
    console.log("You fetched " + event.url);
});
The code adds an EventListener that’s vital for our further operation. In fact, many browsers including Chrome will not allow your PWA to be installed unless there’s a fetch listener registered.
The addEventListener in the code above has two arguments: the event(s) to be listened to and a callback that takes an event object. Once this event is in place, your service worker will now start listening for fetch events which include requests for your website’s HTML, CSS, JS, audio, images, and any other requests to APIs/other websites.

Caching your resources
In order for your PWA to be offline-capable, service workers pay a part in serving the content, but you’d also need to cache your page’s resources as well.
To cache your page’s resources, first you need to plan out the size of your Cache Storage since there’s a limit to it.
Cache Storage limit
Each browser has a different way of handling cache storage. Almost all of them, however, have a limit to the size to Cache Storage—this limit is often why you don’t see big and obese sites such as Amazon caches their entire store using service workers.
Now, this limit varies because of it being dependent on the end user’s device; but normally it should be around 20% of your user’s maximum disk space. For more information, you can refer to our chart below or to Google’s official guide on Offline Storage for Progressive Web Apps.

Now that we’ve got this Cache Storage limit out of the way, let’s move on to actually cache your resources.
To cache your page’s resources, we need a global array which contains all the assets that we want to store:
/*
  This is all the stuff that we want to save in the cache.
  In order for the app to work offline/be installable,
  we have to save not just images but our HTML, JS, and CSS
  as well - anything we want to use when offline.
*/
const ASSETS = [
    "https://i.imgur.com/Kbkqr2n.png",
    "https://i.imgur.com/lgLaG0x.png",
    "https://i.imgur.com/0iL8mxP.png",
    "https://i.imgur.com/KDsdYeS.png",
    "https://i.imgur.com/mK50fqL.png",
    "https://i.imgur.com/KYGH2Qa.png",
    "/style.css",
    "/index.html",
    "/offline.html",
    "/"
];
This is where everything that you want to use offline is stored. In the above example, the first few images are paths to Imgur where a variety of SimiCart’s logo is stored.
With this step, our list of necessary resources for offline-uses is now ready. Let’s cache them using service workers.
Add this top at the top of your sw.js:
// sw.js

let cache_name = "SimiCart"; // The string used to identify our cache

self.addEventListener("install", event => {
    console.log("installing...");
    event.waitUntil(
        caches
            .open(cache_name)
            .then(cache => {
                return cache.addAll(assets);
            })
            .catch(err => console.log(err))
    );
});
Essentially, this code instructs the browser to wait (using the waitUntil() call) for our caching.
By using the cache API, specifically the addAll(), our array of assets can be effortlessly added to the cache, ready to be served by the service workers. Well, on second thought, it’s not that ready. We’d still need to modify our fetch event handler a bit.
This is what it’ll look like now:
self.addEventListener("fetch", event => {
    if (event.request.url === "https://simicart.com/") {
        // or whatever your app's URL is
        event.respondWith(
            fetch(event.request).catch(err =>
                self.cache.open(cache_name).then(cache => cache.match("/offline.html"))
            )
        );
    } else {
        event.respondWith(
            fetch(event.request).catch(err =>
                caches.match(event.request).then(response => response)
            )
        );
    }
});
It should now be clear in the code above that we’re attempting to cache resources even when the app is offline. The logic is as follow:
- First, the app attempts to get resources online and response with the cached resources if that fetch fails (using the
respondWith()). - Within the
respondWith(), we callfetch(event.request)to try to fetch resources from the network, and since fetch isPromisebased, thePromisewill reject if it fails to connect to the network and in turn, trigger thecatch()statement. - In the
catch()statement is where you’d want to call your cached resources.
And that’s it. Your PWA should now be able to work offline! Pretty easy, ain’t it?
Conclusion
Things are moving pretty fast in the technological world and the longer you wait to convert to PWA or integrate a vital function such as offline capabilities into your PWA, the more opportunity cost for you and your business.

